How to Create API Keys for Binance Futures
RobiTrader.com and automate your Futures trading. Before starting, make sure your Binance account is fully verified.

Prerequisites Before Enabling Binance Futures API for
Before creating and enabling your API key for connecting Binance to RobiTrader.com, make sure you have completed the following steps:
Binance Account Registration & Verification
Your Binance account is registered.
Both Basic and Intermediate verification are completed.
2FA (Two-Factor Authentication) is enabled using Google Authenticator or SMS.
Binance Futures Account Activation
Your Futures account (USDⓈ-M or COIN-M) is activated.
You are familiar with leverage, margin, and risk management.
RobiTrader.com Account
You have created a RobiTrader.com account.
You have activated the plan required for API integration.
Fund Preparation in Futures Wallet
Funds have been transferred from your Spot Wallet to your Futures Wallet.
You have sufficient balance for Futures trading.
IP Whitelisting Preparedness
RobiTrader.com provides you with IP addresses to whitelist.
You are ready to add these IPs in API Restrictions → Trusted IPs on Binance to enhance security.
Step 1: Enter the API Management Section
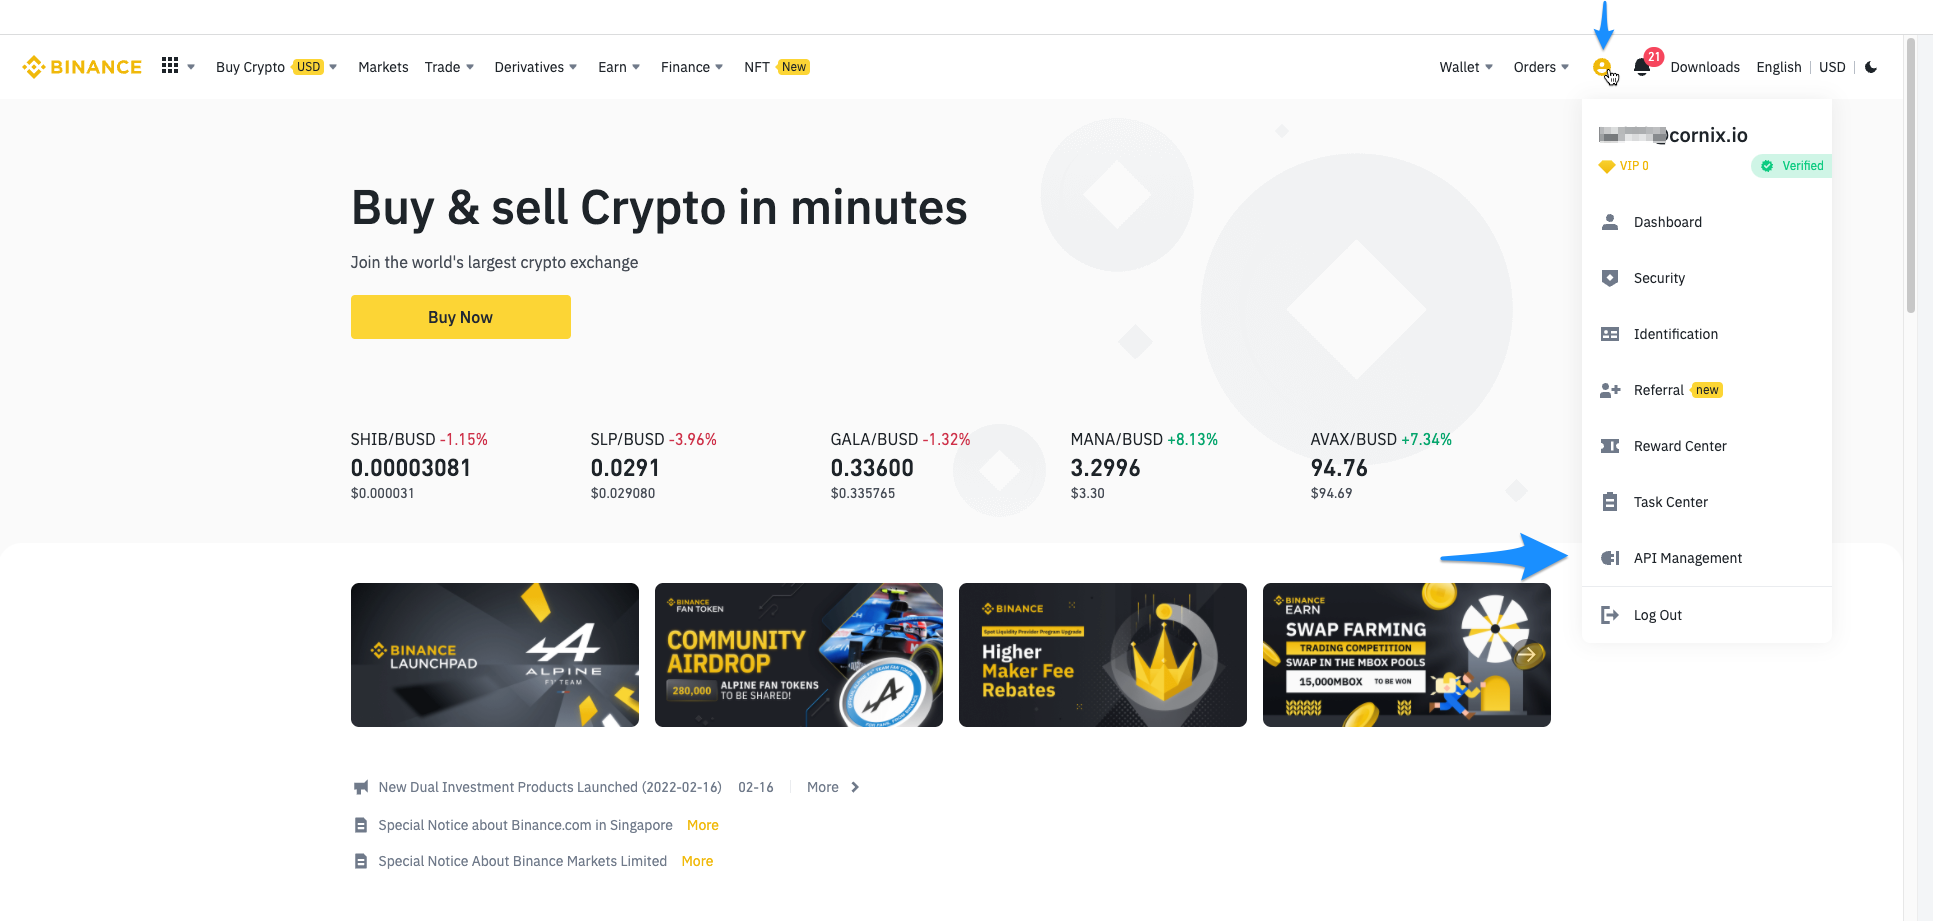
Log in to your Binance account.
Click on your profile icon in the top-right corner and select API Management from the dropdown menu.
This section allows you to create, manage, and configure your API keys for different purposes.
Step 2: Click the “Create API” Button
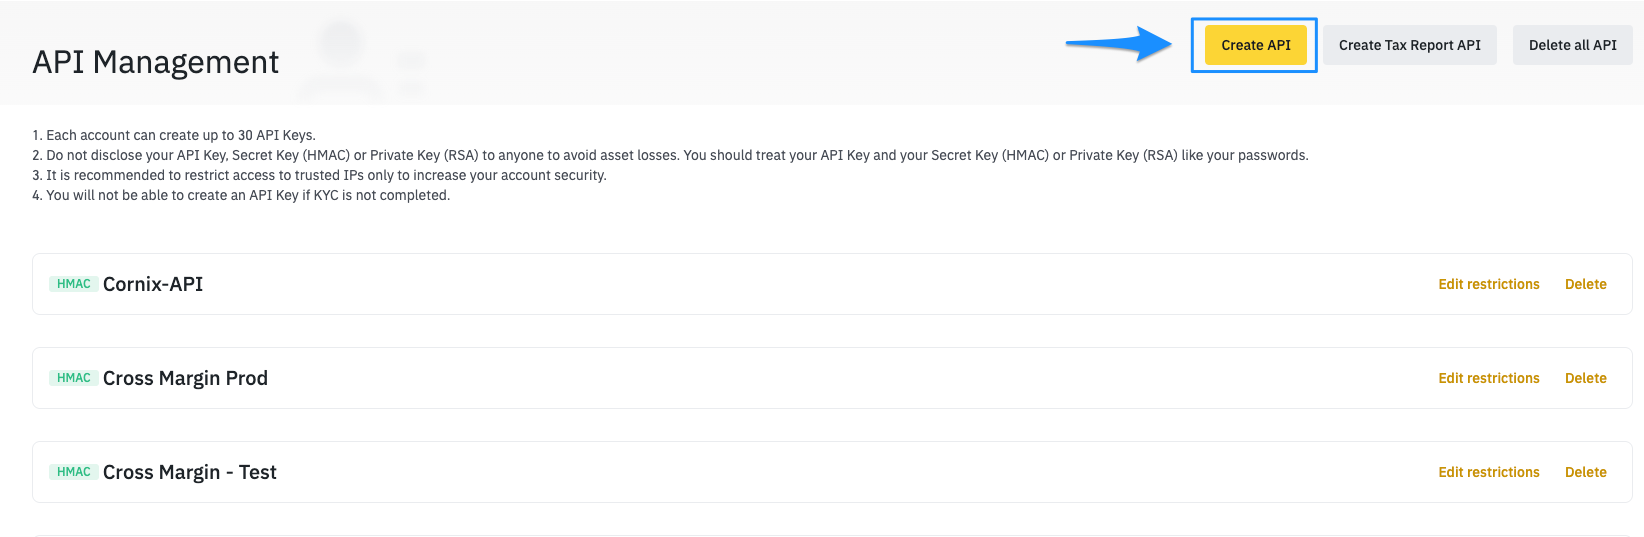
In the API Management page, click Create API.
If you already have existing API keys, the button and input fields may appear in different locations on the page.
Step 3: Choose API Key Type
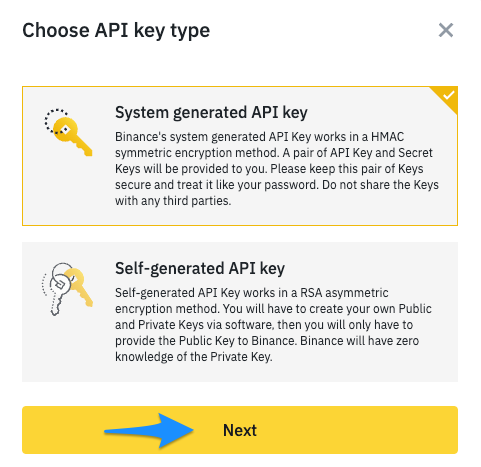
Binance allows you to auto-generate your API keys, which is the recommended option for most users.
Advanced users can choose to create their own API keys through external software, but this is optional.
Step 4: Name Your API Key
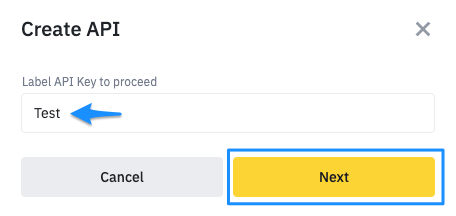
Enter a descriptive name for your API Key, such as
FuturesAPIorRobiTraderFutures.Click Next to continue.
Step 5: Complete Security Verification
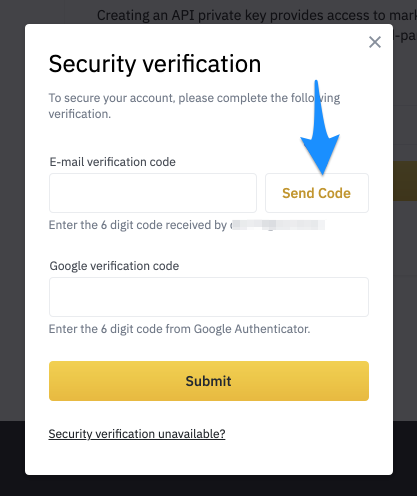
After clicking Next, complete the slide captcha.
A modal will appear requesting Email or Phone verification code and Google Authenticator 2FA code.
Click Send Code to receive the verification code via email or SMS.
Enter the received codes and confirm to proceed.
Step 6: Set API Permissions

Once the API Key is created, you need to configure its permissions:
Enable Reading — allows the platform to access account information.
Enable Futures — necessary for COIN-M and USD-M Futures trading.
Important Security Step
Add the IP addresses of RobiTrader.com to Binance’s trusted IP list

This ensures the API key is secure and will not expire quickly. You will receive the required IP addresses from RobiTrader.com when setting up your account.
Additional Tips
Never share your Secret Key with anyone. It is shown only once during creation.
Use IP restriction to allow access only from trusted devices or servers.
Do not enable withdrawal permissions unless absolutely necessary — this is a major security risk.
Always store your keys in a secure password manager.